
Getting started with Python Algorand SDK and Django

Overview

Introduction
The purpose of this blog post is to introduce the reader to the Algorand SDK and its implementation in the Django framework.
All the source code for this blog is available in a public GitHub repository.
Requirements
This project uses a Python wrapper around Algorand SDK, so you should have Python 3 installed on your system. Also, this project uses python3-venv package for creating virtual environments and you have to install it if it’s not already installed in your system. For a Debian/Ubuntu based systems, you can do that by issuing the following command:
$ sudo apt-get install python3-venv
In order to clone the Algorand Sandbox (as opposed to just download its installation archive), you’ll also need Git distributed version control system.
Setup and run Algorand Sandbox
Let’s create the root directory named algorand where your Django project and Sandbox will reside.
cd ~
mkdir algorand
cd algorand
This project depends on Algorand Sandbox running in your computer. Use its README for the instructions on how to prepare its installation on your system. You may clone the Algorand Sandbox repository with the following command:
git clone https://github.com/algorand/sandbox.git
Start the Sandbox Docker containers by issuing the following command:
./sandbox/sandbox up
For the rest of this post, we’ll assume that Sandbox is up and running in your system.
Note
This project code implies that the Sandbox executable is in the sandbox directory which is a sibling to this project’s directory:
$ tree -L 1
.
├── algodjango
└── sandbox
If that’s not the case, then you should set SANDBOX_DIR environment variable holding sandbox directory before running this project’s Django development server:
export SANDBOX_DIR="/home/ipaleka/dev/algorand/sandbox
Create and activate Python virtual environment
Every Python-based project should run inside its own virtual environment. Create and activate one for this project with:
python3 -m venv algovenv
source algovenv/bin/activate
After successful activation, the environment name will be presented at your prompt and that indicates that all the Python package installations issued will reside only in that environment.
(algovenv) $
We’re ready now to install our project’s main dependencies: the Python Algorand SDK and Django.
(algovenv) $ pip install py-algorand-sdk Django
Version 1.5.0 of Python Algorand SDK and Django LTS version 3.2 are going to be installed by issuing that command at the time of writing this blog post.
Create Django project and the main application
Django ships with a helper shortcut utility django-admin that will help us in the creation of our project files. Create our project named algodjango with:
(algovenv) $ django-admin startproject algodjango
That command will create the root directory for our project together with the project’s directory having the same name:
(algovenv) $ tree
.
└── algodjango
    ├── algodjango
    │   ├── asgi.py
    │   ├── __init__.py
    │   ├── settings.py
    │   ├── urls.py
    │   └── wsgi.py
    └── manage.py
A Django project is made of applications. All the functionality of this project will reside in a single app. Change directory to the project’s root directory and use the startapp Django management command to create our app named mainapp:
(algovenv) $ cd algodjango
(algovenv) $ python manage.py startapp mainapp
That creates a new directory inside the project’s root directory with the following structure:
(algovenv) $ tree
.
├── algodjango
│   ├── asgi.py
│   ├── __init__.py
│   ├── settings.py
│   ├── urls.py
│   └── wsgi.py
├── mainapp
│   ├── admin.py
│   ├── apps.py
│   ├── __init__.py
│   ├── migrations
│   │   └── __init__.py
│   ├── models.py
│   ├── tests.py
│   └── views.py
└── manage.py
We need one more thing before we start writing our app code. Use your favorite editor and open the settings.py file placed in the project’s directory. Find the INSTALLED_APPS setting and prepend the list with our app’s configuration class. Afterward, that setting should look like this:
INSTALLED_APPS = [
    "mainapp.apps.MainappConfig",
    "django.contrib.admin",
    "django.contrib.auth",
    "django.contrib.contenttypes",
    "django.contrib.sessions",
    "django.contrib.messages",
    "django.contrib.staticfiles",
]
Now you may start the Django development server with:
(algovenv) $ python manage.py runserver
Watching for file changes with StatReloader
Performing system checks...

System check identified no issues (0 silenced).

You have 18 unapplied migration(s). Your project may not work properly until you apply the migrations for app(s): admin, auth, contenttypes, sessions.
Run 'python manage.py migrate' to apply them.
June 20, 2021 - 20:42:22
Django version 3.2.4, using settings 'algodjango.settings'
Starting development server at http://127.0.0.1:8000/
Quit the server with CONTROL-C.
Ignore that warning about unapplied migrations for now and point your browser to the specified URL (http://127.0.0.1:8000/). You should see a page similar to the following one:
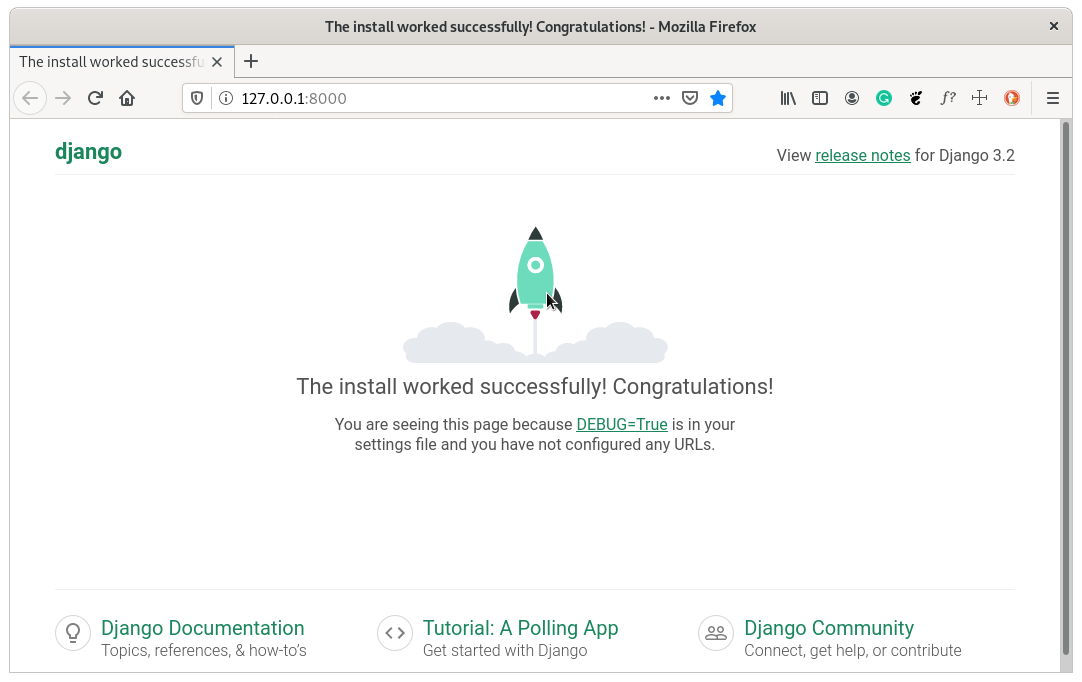
If all goes well then you’re ready to start writing code for your Algorand application.
Our first Django page
In the next few sections, we’re going to configure and create code for our first Django-based HTML page.
Application’s URL configuration
Django URL dispatcher routes predefined URLs to Django views and that URL configuration is placed in the urls.py file in the project directory. We’ll create a separate URL configuration file inside our main application directory and change the project’s URL dispatcher to include that newly created configuration:
Project’s URL dispatcher algodjango/urls.py:
from django.contrib import admin
from django.urls import include, path


urlpatterns = [
    path("admin/", admin.site.urls),
    path("", include("mainapp.urls")),
]
Create a new python module mainapp/urls.py with the following content:
from django.urls import path

from . import views


urlpatterns = [
    path("", views.index, name="index"),
]
Root page view
An empty string as a URL defines the root page of the site - in the case of our development server that would be http://127.0.0.1:8000/. From now on, every request in your browser to the root page of the site will execute code from the index function found inside mainapp/views.py module.
Note
You may implement Django views in two different ways: as function based views or as class-based views. Please take some time to familiarize yourself with the class-based views in Django because they can make your coding more powerful and more secure, but for the purpose of technology introduction to the readers, like in this blog post, the function-based views are probably easier to grasp on and so are the better choice.
Our root/index page will be used to display the list of all created standalone accounts in our application. Besides those standalone accounts, we’ll be creating and displaying accounts connected to the wallets in our app. There are other types of accounts that are entities in the Algorand blockchain, like special or multi-signature accounts, but those are out of scope for this project.
Update the views.py module with the code as follows:
from django.shortcuts import render

from .models import Account


def index(request):
    """Display all the created standalone accounts."""

    accounts = Account.objects.order_by("-created")
    context = {"accounts": accounts}
    return render(request, "mainapp/index.html", context)
So, we fetch all the account objects from the database (we’ll get to that code related to the database in a minute) and we pass them in the form of a Python dictionary as the context of the index page template rendered by Django framework (another code yet to be created).
Note
We may use the Algorand SDK for the same purpose of fetching created accounts, but keeping those records in the application database surely represents a real-world application.
Account model
Django model is a class that represents a table in your database. The default database engine of a newly created Django project is SQLite and we’re going to use it in this project. That engine creates a single file in the project’s root directory named db.sqlite3 which represents our database.
Edit the models.py module and add the following code:
from algosdk.constants import address_len
from django.db import models

from .helpers import passphrase_from_private_key


class Account(models.Model):
    """Base model class for Algorand accounts."""

    address = models.CharField(max_length=address_len)
    private_key = models.CharField(max_length=address_len + hash_len)
    created = models.DateTimeField(auto_now_add=True)

    def balance(self):
        """Return this instance's balance in microAlgos."""
        return 0

    @property
    def passphrase(self):
        """Return account's mnemonic."""
        return passphrase_from_private_key(self.private_key)
Security warning
Together with the account address, we also store its private key in our database. The reasoning behind this is that a simple user flows better suits this demonstration app than an implementation of security best practices.
As you can see, we introduced a new module named helpers.py. That module will hold all the Algorand functionality code of our project. Create that module in the main app directory with the following content:
mainapp/helpers.py
from algosdk import mnemonic


def passphrase_from_private_key(private_key):
    """Return passphrase from provided private key."""
    return mnemonic.from_private_key(private_key)
This code that uses Algorand SDK should be straightforward: we used the provided private key to get the account’s passphrase.
In order to apply those changes to our database, run the following Django management commands:
(algovenv) $ python manage.py makemigrations
(algovenv) $ python manage.py migrate
If you start the development server now, you can see that the warning from the above (about unapplied migrations) has gone.
Index page template
In order to render the accounts data in the browser, we must create a Django template of our index page. The default placement for such template is in the mainapp subdirectory of the templates directory inside our application directory:
(algovenv) $ mkdir -p mainapp/templates/mainapp
Now create the following two files in that directory:
mainapp/templates/mainapp/base.html
{% load static %}<!DOCTYPE html>
<html>
  <head>
    <meta name="viewport" content="width=device-width, initial-scale=1">
    <title>{% block title %}Accounts{% endblock %}</title>
    <link rel="stylesheet" type="text/css" href="{% static 'mainapp/style.css' %}">
  </head>
  <body>
    <div class="topnav">
      <a href="/"{% if request.path == '/' %} class="active"{% endif %}>Standalone accounts</a>
    </div>
    <div class="body">{% block body %}{% endblock %}</div>
  </body>
</html>
mainapp/templates/mainapp/index.html
{% extends 'mainapp/base.html' %}
{% block title %}Standalone accounts{% endblock %}
{% block body %}
  <h1>Standalone accounts list</h1>
  {% if accounts %}
  <ul>
  {% for account in accounts %}
    <li><a href="/standalone-account/{{ account.address }}">{{ account.address }}</a> : {{ account.balance }} microAlgos</li>
  {% endfor %}
  </ul>
  {% else %}
  <p>There are no standalone accounts.</p>
  {% endif %}
  <br>
  <a href="/create-standalone/">Create standalone account</a>
{% endblock %}
We’re going to use this base.html in all of our templates in this project. In short, based on the DRY principle and with the help of the Django template system, our templates will share the same HTML page headers and the navigation bar. As you might have already guessed from these templates, we extend the base template and change the defined blocks of data in the derived templates.
In the index template, we loop through the context’s accounts - the value we provided to the template in our index view. For each account, we create an unordered list item with a link to that account’s detail page (a template we haven’t created yet).
CSS styling
We need to do one more thing before we point our browser to the index page - improve the aesthetic of our pages! This part is optional and it won’t change the project’s functionality, but maybe it will help you in configuring your future Django-based Algorand’s projects.
As you can see from the base.html template, the CSS for our site is located in the style.css file. The default placement for the static files in Django projects is similar to templates:
(algovenv) $ mkdir -p mainapp/static/mainapp
Now create the style.css file in that directory with the following content:
body {
    margin: 0;
    font-family: Arial, Helvetica, sans-serif;
}

.body {
    margin: 5px;
}

.topnav {
    overflow: hidden;
    background-color: #222;
}

.topnav a {
    float: left;
    color: #fbfbfb;
    text-align: center;
    padding: 12px 12px;
    text-decoration: none;
    font-size: 16px;
}

.topnav a:hover {
    background-color: #eee;
    color: black;
}

.topnav a.active {
    background-color: #5d6d7e;
    color: white;
}
Run the development server now (python manage.py runserver) and point your browser to the root page (http://127.0.0.1:8000/). If all goes well, you should see the index that looks like this:
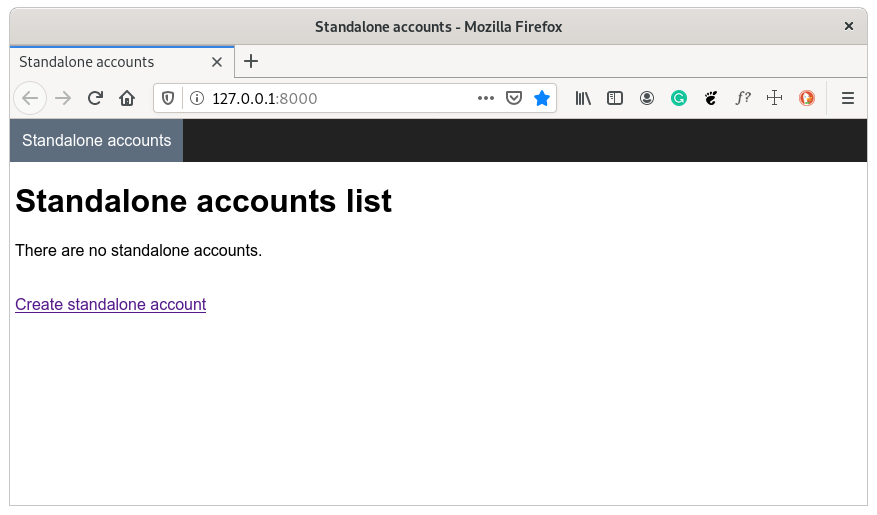
Congratulations on your first Django page!
Standalone account creation
All the sections and code from previous sections can be used for the general purpose of creating web pages with Django. Those introduction steps were needed to get you familiarized with the basic Django principles and now we’re finally ready to start using Algorand SDK!
We created a link in the index page to the page used for the creation of a standalone account. Now, update the app’s urls.py and views.py modules with the related code.
mainapp/urls.py
urlpatterns = [
    #
    path("create-standalone/", views.create_standalone, name="create-standalone"),
]
mainapp/views.py
from .helpers import add_standalone_account


def create_standalone(request):
    """Create standalone account."""
    private_key, address = add_standalone_account()
    account = Account.objects.create(address=address, private_key=private_key)
    context = {"account": (address, account.passphrase)}
    return render(request, "mainapp/create_standalone.html", context)
A new account record in the database is created by calling the create method on the Account’s model objects manager. All the required model field values should be provided to the create method in order to successfully create an object - in our case that would be the account’s address and private key.
Add the following function to helpers module:
mainapp/helpers.py
from algosdk import account


def add_standalone_account():
    """Create standalone account and return two-tuple of its private key and address."""
    private_key, address = account.generate_account()
    return private_key, address
We created an account and returned private key and address in order to create an account in our database.
Now create the template that will be rendered upon account creation.
mainapp/templates/mainapp/create_standalone.html
{% extends 'mainapp/base.html' %}
{% block title %}Create standalone account{% endblock %}
{% block body %}
  <h1>New standalone account</h1>
  {% if account %}
  <p>Your standalone account has been created. Please write down the following data:</p>
  <p><strong>Address</strong>: {{ account.0 }}</p>
  <p><strong>Passphrase</strong>: {{ account.1 }}</p>
  <br>
  <a href="/initial-funds/{{ account.0 }}/">Add initial funds</a>
  {% endif %}
{% endblock %}
We provided a two-tuple (a tuple consisting of two items) as the context to this template and its values are retrieved by the related indexes.
Note
For the production - contrary to what was done in this application with storing the private keys in the database - you should emphasize the fact that this would be the only time the account’s passphrase is presented to the user.
Go to the index page, click the link entitled Create standalone account and you should see the page that looks like:

Initial funds for the standalone accounts
Algorand Sandbox operates either in a real network mode (using one of the Algorand’s public networks) or in a private network mode. In the former case, you may use the Testnet and add funds to your account in the Algorand dispenser, but we use the private network mode in this project which has been the default setup for the Sandbox. Algorand Sandbox creates some test accounts filled with Algos and we’ll use one of those accounts to transfer initial funds to the accounts created by our application.
The following code in helpers.py module is responsible for retrieving the address of a test account (created by Sandbox) that has enough funds (funds to transfer plus the minimum requirement of 0.1 Algo) which can be transferred to our accounts:
from algosdk.constants import microalgos_to_algos_ratio
from algosdk.v2client import indexer

INITIAL_FUNDS = 1000000000  # in microAlgos


def _indexer_client():
    """Instantiate and return Indexer client object."""
    indexer_address = "http://localhost:8980"
    indexer_token = "aaaaaaaaaaaaaaaaaaaaaaaaaaaaaaaaaaaaaaaaaaaaaaaaaaaaaaaaaaaaaaaa"
    return indexer.IndexerClient(indexer_token, indexer_address)


def initial_funds_sender():
    """Get the address of initially created account having enough funds."""
    return next(
        (
            account.get("address")
            for account in _indexer_client().accounts().get("accounts", [])
            if account.get("created-at-round") == 0
            and account.get("amount") > INITIAL_FUNDS + microalgos_to_algos_ratio / 10
        ),
        None,
    )
Every transaction in the Algorand blockchain has to be signed by the sender account, so we also need the passphrase of the sender account. We use Python capabilities for communicating with command-line interfaces and the Sandbox process to export that passphrase using Algorand’s goal command:
mainapp\helpers.py
import io
import os
import subprocess
from pathlib import Path


def _call_sandbox_command(*args):
    """Call and return sandbox command composed from provided arguments."""
    return subprocess.Popen(
        [_sandbox_executable(), *args],
        stdout=subprocess.PIPE,
        stderr=subprocess.PIPE,
    )


def _sandbox_executable():
    """Return full path to Algorand's sandbox executable.

    The location of sandbox directory is retrieved either from the SANDBOX_DIR
    environment variable or if it's not set then the location of sandbox directory
    is implied to be the sibling of this Django project in the directory tree.
    """
    sandbox_dir = os.environ.get("SANDBOX_DIR") or str(
        Path(__file__).resolve().parent.parent.parent / "sandbox"
    )
    return sandbox_dir + "/sandbox"


def cli_passphrase_for_account(address):
    """Return passphrase for provided address."""
    process = _call_sandbox_command("goal", "account", "export", "-a", address)
    passphrase = ""
    for line in io.TextIOWrapper(process.stdout):
        parts = line.split('"')
        if len(parts) > 1:
            passphrase = parts[1]
    return passphrase
Let’s create the related URL and view:
mainapp/urls.py
urlpatterns = [
    #
    path("initial-funds/<str:receiver>/", views.initial_funds, name="initial-funds"),
]
mainapp\views.py
from django.contrib import messages
from django.shortcuts import redirect

from .helpers import (
    INITIAL_FUNDS,
    add_transaction,
    cli_passphrase_for_account,
    initial_funds_sender,
)


def initial_funds(request, receiver):
    """Add initial funds to provided standalone receiver account."""
    sender = initial_funds_sender()
    if sender is None:
        message = "Initial funds weren't transferred!"
        messages.add_message(request, messages.ERROR, message)
    else:
        add_transaction(
            sender,
            receiver,
            cli_passphrase_for_account(sender),
            INITIAL_FUNDS,
            "Initial funds",
        )
    return redirect("standalone-account", receiver)
As you can see, the URL contains a receiver address and that address is supplied as a positional argument to the view.
We’ll get to the add_transaction function in a minute, let’s first create the template where this view redirects:
mainapp\templates\mainapp\standalone_account.html
{% extends 'mainapp/base_account.html' %}
We use the base template here because we’ll later code the functionality for wallet-based accounts that will use the same base template:
mainapp\templates\mainapp\base_account.html
{% extends 'mainapp/base.html' %}
{% block title %}Account page{% endblock %}
{% block body %}
  <h1>{% block prefix %}Standalone{% endblock prefix %} account page</h1>
  {% block start %}{% endblock start %}
  <p>Address: {{ account.address }}</p>
  <p>Created: {{ account.created }}</p>
  <p>Balance: {{ account.balance }} microAlgos</p>
  <br>
  {% if messages %}
    <ul class="messages">
      {% for message in messages %}
        <li{% if message.tags %} class="{{ message.tags }}"{% endif %}>{{ message }}</li>
      {% endfor %}
    </ul>
  {% endif %}
{% endblock body %}
As you can see from the presented code if the transfer of the initial funds fails then the error message is rendered. Update our styling CSS too so the error text is displayed in red:
mainapp/static/mainapp/style.css
ul.messages li.error {
    color: red;
}

ul.messages li.success {
    color: green;
}
One more thing we should do before we get to the add_transaction SDK call - we need to update the account model with the proper balance method:
mainapp\models.py
from .helpers import account_balance

class Account(models.Model):
    #

    def balance(self):
        """Return this instance's balance in microAlgos."""
        return account_balance(self.address)
The code for that account_balance helper function should be straightforward: we use predefined (by Algorand Sandbox) tokens and API endpoints to instantiate Algod client and then we use the account_info method of that client to retrieve the funds amount in microAlgos.
mainapp\helpers.py
from algosdk.v2client import algod


def _algod_client():
    """Instantiate and return Algod client object."""
    algod_address = "http://localhost:4001"
    algod_token = "aaaaaaaaaaaaaaaaaaaaaaaaaaaaaaaaaaaaaaaaaaaaaaaaaaaaaaaaaaaaaaaa"
    return algod.AlgodClient(algod_token, algod_address)


def account_balance(address):
    """Return funds balance of the account having provided address."""
    account_info = _algod_client().account_info(address)
    return account_info.get("amount")
Create and sign a transaction on the Algorand blockchain
Algorand and Python Algorand SDK allow you to change various arguments in the transactions creating process according to your needs, We’ll be using the suggested parameters by Algorand SDK for the purpose of this project.
mainapp\helpers.py
from algosdk.future.transaction import PaymentTxn
from algosdk.error import WrongChecksumError


def add_transaction(sender, receiver, passphrase, amount, note):
    """Create and sign transaction from provided arguments."""

    client = _algod_client()
    params = client.suggested_params()
    unsigned_txn = PaymentTxn(sender, params, receiver, amount, None, note.encode())
    try:
        signed_txn = unsigned_txn.sign(mnemonic.to_private_key(passphrase))
    except WrongChecksumError:
        return "passphrase", "Checksum failed to validate"
    except ValueError:
        return "passphrase", "Unknown word in passphrase"

    try:
        transaction_id = client.send_transaction(signed_txn)
        _wait_for_confirmation(client, transaction_id, 4)
    except Exception as err:
        return None, err  # None implies non-field error
    return "", ""
The code for _wait_for_confirmation function is still our obligation for the version 1.5.0 of the py-algorand-sdk, but it will probably be a part of the Algorand’s Python SDK in the future.
mainapp\helpers.py
def _wait_for_confirmation(client, transaction_id, timeout):
    """
    Wait until the transaction is confirmed or rejected, or until 'timeout'
    number of rounds have passed.
    Args:
        transaction_id (str): the transaction to wait for
        timeout (int): maximum number of rounds to wait
    Returns:
        dict: pending transaction information, or throws an error if the transaction
            is not confirmed or rejected in the next timeout rounds
    """
    start_round = client.status()["last-round"] + 1
    current_round = start_round

    while current_round < start_round + timeout:
        try:
            pending_txn = client.pending_transaction_info(transaction_id)
        except Exception:
            return
        if pending_txn.get("confirmed-round", 0) > 0:
            return pending_txn
        elif pending_txn["pool-error"]:
            raise Exception("pool error: {}".format(pending_txn["pool-error"]))
        client.status_after_block(current_round)
        current_round += 1
    raise Exception(
        "pending tx not found in timeout rounds, timeout value = : {}".format(timeout)
    )
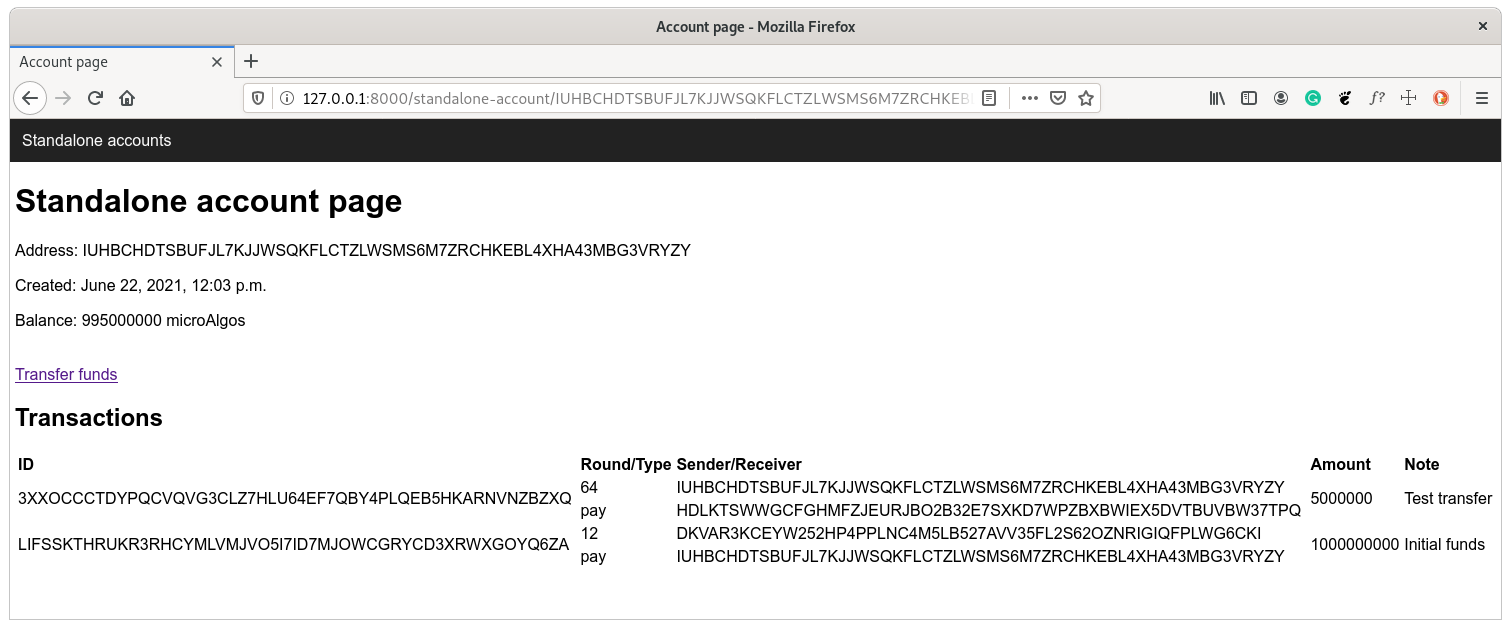
And now you’re ready to transfer the initial funds to your account. Point your browser to the index page, create a standalone account, click the Add initial funds link, wait no more than 5 seconds for the transaction confirmation on the blockchain, and - voilà! - you’ve got your Algos!
Display account’s transactions
The account page should display a list of all created transactions. Edit the account model and add the following method:
mainapp\models.py
from .helpers import account_transactions


class Account(models.Model):
    #
    def transactions(self):
        """Return all the transactions involving this account."""
        return account_transactions(self.address)
The code that will return the list of provided account’s transactions is placed in the account_transactions helper function:
mainapp\helpers.py
import base64


def account_transactions(address):
    """Return all transactions involving provided address."""
    transactions = (
        _indexer_client()
        .search_transactions_by_address(address)
        .get("transactions", [])
    )
    return [
        {
            "id": tr.get("id"),
            "round": tr.get("confirmed-round"),
            "type": tr.get("tx-type"),
            "sender": tr.get("sender"),
            "receiver": tr.get("payment-transaction", {}).get("receiver"),
            "amount": tr.get("payment-transaction", {}).get("amount"),
            "note": base64.b64decode(tr.get("note", "")).decode("utf-8"),
        }
        for tr in transactions
    ]
You can see that transaction notes in the Algorand blockchain are base64 encoded, so we have to decode them in order to present them in a human-readable way.
Update the base account template by adding the following code just before the {% endblock body %} tag:
mainapp\templates\mainapp\base_account.html
  <h2>Transactions</h2>
  <table class="full-width">
  <tr>
    <th>ID</th>
    <th>Round/Type</th>
    <th>Sender/Receiver</th>
    <th>Amount</th>
    <th>Note</th>
  </tr>
  {% for transaction in account.transactions %}
  <tr>
    <td rowspan="2">{{ transaction.id }}</td>
    <td>{{ transaction.round }}</td>
    <td>{{ transaction.sender }}</td>
    <td rowspan="2">{{ transaction.amount }}</td>
    <td rowspan="2">{{ transaction.note }}</td>
  </tr>
  <tr>
    <td>{{ transaction.type }}</td>
    <td>{{ transaction.receiver }}</td>
  </tr>
  {% endfor %}
</table>
Also, add the following rules to our CSS:
mainapp/static/mainapp/style.css
table.full-width {
    width: 100%;
}

th {
    text-align: left;
}
From now on, every account’s transaction will be displayed as a table row at the end of the account page.
Transfer funds functionality
In this section, we’ll use one of the most powerful Django beasts - its forms system!
For the start, edit the base account page template once again and add the the following link just before the transactions table:
mainapp\templates\mainapp\base_account.html
<a href="/transfer-funds/{{ account.address }}/">Transfer funds</a>
The URL configuration should look like this:
mainapp/urls.py
urlpatterns = [
    #
    path("transfer-funds/<str:sender>/", views.transfer_funds, name="transfer-funds"),
]
Now create a brand new module forms.py in the main application directory and add the following code into it:
mainapp/forms.py
from algosdk.constants import address_len, mnemonic_len, note_max_length
from algosdk.encoding import is_valid_address
from django import forms
from django.core.exceptions import ValidationError
from django.forms.fields import CharField


class TransferFundsForm(forms.Form):
    """Django form for transferring microAlgos between accounts."""

    passphrase = forms.CharField(required=False)
    receiver = forms.CharField(max_length=address_len)
    amount = forms.IntegerField(min_value=1)
    note = forms.CharField(max_length=note_max_length, required=False)

    def clean_passphrase(self):
        """Example validation for the passphrase field."""
        data = self.cleaned_data["passphrase"]
        words = data.split(" ")
        if len(words) != mnemonic_len:
            raise ValidationError(
                "Passphrase must have exactly %s words!" % (mnemonic_len,)
            )
        return data

    def clean_receiver(self):
        """Example validation for the receiver field."""
        data = self.cleaned_data["receiver"]
        if not is_valid_address(data):
            raise ValidationError("Provided value is not a valid Algorand address!")
        return data
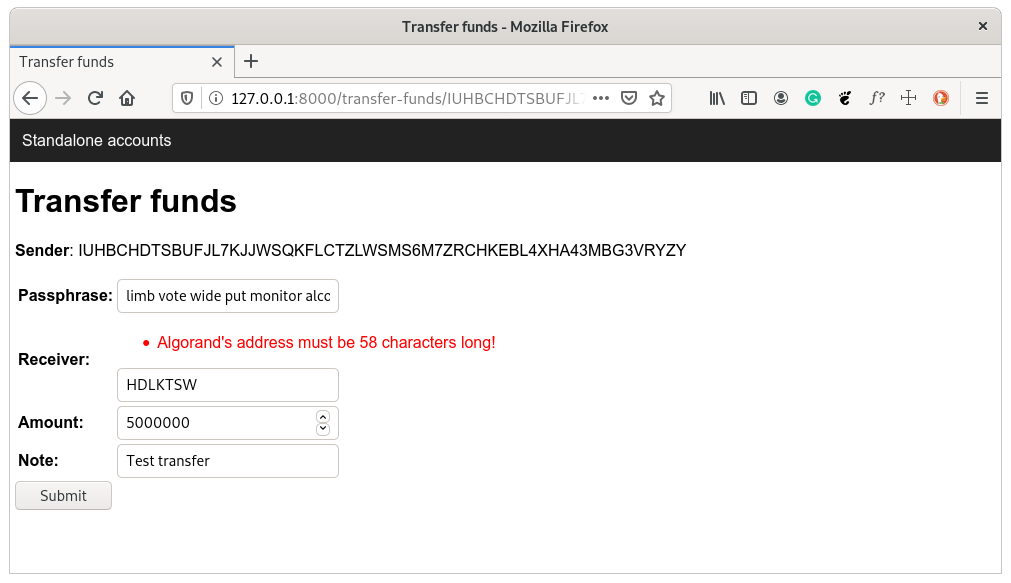
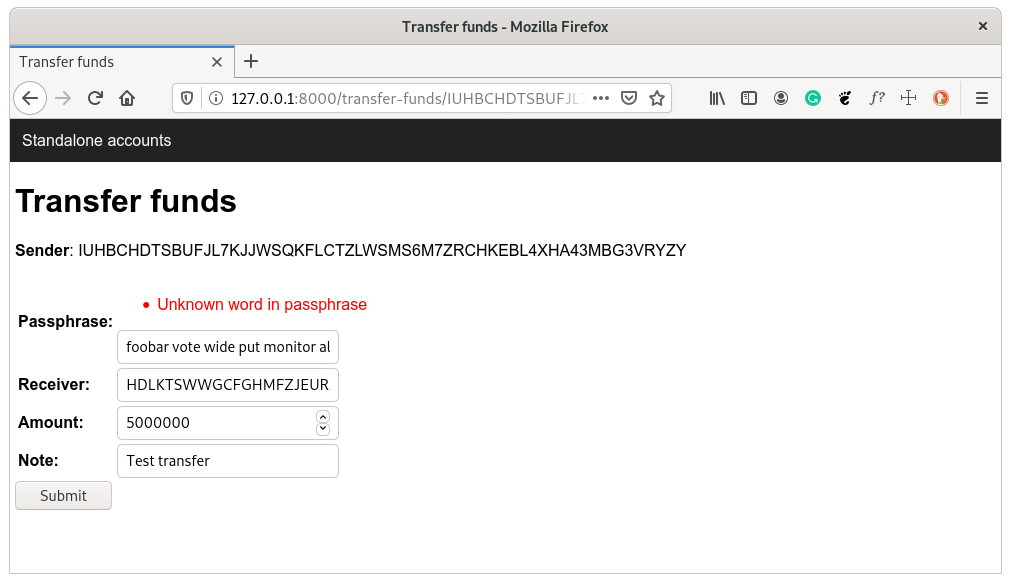
When a validation error is raised during the form submission process inside the Django framework, then the form is returned with either the field error(s) or with a non-field error. Django forms system can take care of some predefined requirements on the client-side (like the receiver or note field length in this form) before validation takes place on the server-side. In this form, we validate two fields, passphrase and receiver, for some simple requirements.
The template responsible for rendering this form looks like this:
mainapp/templates/mainapp/transfer_funds.html
{% extends 'mainapp/base.html' %}
{% block title %}Transfer funds{% endblock %}
{% block body %}
  <h1>Transfer funds</h1>
  <p><strong>Sender</strong>: {{ sender }}</p>
  <form action="/transfer-funds/{{ sender }}/" method="post">
    {% csrf_token %}
    <table>{{ form.as_table }}</table>
    <input type="submit" name="submit" value="Submit">
    <br><br><hr>
    <p><span style="color:red">WARNING: don't do this in production</span></p>
    <input type="submit" name="retrieve_passphrase" value="Retrieve passphrase">
  </form>
{% endblock %}
As you can see, we instruct the Django template system to display the form as a table and Django takes care of rendering it properly. Also, every Django form needs the Cross Site Request Forgery protection token tag for security reasons.
Also, for the production, probably a user should manually enter the account’s passphrase.
In order to display the form errors text in red, update the CSS with:
mainapp/static/mainapp/style.css
ul.errorlist li {
    color: red;
}
Now add the following to the main application views module:
mainapp/views.py
from .forms import TransferFundsForm


def transfer_funds(request, sender):
    """Transfer funds from the provided sender account to the receiver from the form."""
    if request.method == "POST":

        if "retrieve_passphrase" in request.POST:
            sender_instance = Account.instance_from_address(sender)
            request.POST = request.POST.copy()
            request.POST.update({"passphrase": sender_instance.passphrase})
            form = TransferFundsForm(request.POST)
        else:

            form = TransferFundsForm(request.POST)

            if form.is_valid():

                error_field, error_description = add_transaction(
                    sender,
                    form.cleaned_data["receiver"],
                    form.cleaned_data["passphrase"],
                    form.cleaned_data["amount"],
                    form.cleaned_data["note"],
                )
                if error_field == "":
                    message = "Amount of {} microAlgos has been successfully transferred to account {}".format(
                        form.cleaned_data["amount"], form.cleaned_data["receiver"]
                    )
                    messages.add_message(request, messages.SUCCESS, message)
                    return redirect("standalone-account", sender)

                form.add_error(error_field, error_description)

    else:

        form = TransferFundsForm()

    context = {"form": form, "sender": sender}

    return render(request, "mainapp/transfer_funds.html", context)
This code uses the same template for the GET and the failed POST requests. For the GET it instantiates an empty form, while for the POST the form is instantiated with the user’s data together with the errors, and then it is forwarded to the same template as a context variable. For this example application not suitable for production, we use a different submit button just for retrieving the passphrase from our database and then we instantiate the form with the updated data.
In the case of a successfully validated form, the entered data is sent to the helper function where Algorand SDK tries to create a transaction. That is the second step of the validation process and if Algorand SDK can’t create a transaction from the provided data then we manually add the supplied error to the form and it is forwarded to the same template.
If Algorand SDK successfully manages to create a transaction, then a success message is created and the request redirects to the starting account’s page. Refresh the page after few seconds and both account’s transactions should be displayed:
Wallets creation
We created Algorand’s standalone accounts in the previous sections that aren’t connected to any wallet. Now we’re going to create both the wallets and the accounts connected to them.
Update the app’s URL configuration with all the URL we+re going to manage in this section:
mainapp/urls.py
urlpatterns = [
    #
    path("wallets/", views.wallets, name="wallets"),
    path("create-wallet/", views.create_wallet, name="create-wallet"),
    path("wallet/<str:wallet_id>/", views.wallet, name="wallet"),
    path(
        "create-wallet-account/<str:wallet_id>/",
        views.create_wallet_account,
        name="create-wallet-account",
    ),
    path(
        "wallet-account/<str:wallet_id>/<str:address>/",
        views.wallet_account,
        name="wallet-account",
    ),
]
Our navigation bar located in the base template gets another item:
mainapp\templates\mainapp\base.html
    <div class="topnav">
      <a href="/"{% if request.path == '/' %} class="active"{% endif %}>Standalone accounts</a>
      <a href="/wallets/"{% if request.path == '/wallets/' %} class="active"{% endif %}>Wallets</a>
    </div>
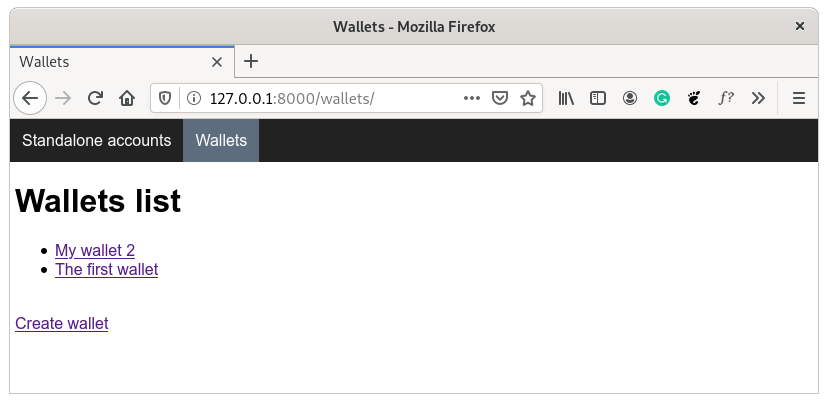
The wallets list page is similar to our index page where all the standalone accounts are displayed:
mainapp\templates\mainapp\wallets.html
{% extends 'mainapp/base.html' %}
{% block title %}Wallets{% endblock %}
{% block body %}
  <h1>Wallets list</h1>
  {% if wallets %}
  <ul>
  {% for wallet in wallets %}
    <li><a href="/wallet/{{ wallet.wallet_id }}">{{ wallet.name }}</a></li>
  {% endfor %}
  </ul>
  {% else %}
  <p>There are no wallets.</p>
  {% endif %}
  <br>
  <a href="/create-wallet/">Create wallet</a>
{% endblock %}
The page used for creating a new wallet should look familiar too:
mainapp\templates\mainapp\create_wallet.html
{% extends 'mainapp/base.html' %}
{% block title %}Create wallet{% endblock %}
{% block body %}
  <h1>Create wallet</h1>
  <form action="/create-wallet/" method="post">
    {% csrf_token %}
    <table>{{ form.as_table }}</table>
    <input type="submit" value="Submit">
  </form>
{% endblock %}
A user defines the name and password of the wallet, while Algorand SDK creates its ID. Those are the wallet properties that we record in our database:
mainapp\models.html
from algosdk.constants import hash_len


class Wallet(models.Model):
    """Model class for wallets."""

    wallet_id = models.CharField(max_length=hash_len)
    name = models.CharField(max_length=50)
    password = models.CharField(max_length=50)
    created = models.DateTimeField(auto_now_add=True)

    @classmethod
    def instance_from_id(cls, wallet_id):
        """Return model instance from provided wallet's ID."""
        try:
            return cls.objects.get(wallet_id=wallet_id)
        except ObjectDoesNotExist:
            raise Http404
To retrieve a wallet object from the wallet ID string we use the class method instance_from_id. So, a call Wallet.instance_from_id(id_string) will either return the wallet instance or will raise the error if there’s no wallet with provided id_string as its ID.
For the purpose of this introduction project and validation example, we define that a password can’t consist just of numbers or just of letters:
mainapp\forms.html
class CreateWalletForm(forms.Form):
    """Django form for creating wallets."""

    name = forms.CharField(min_length=2)
    password = forms.CharField(min_length=2)

    def clean_password(self):
        """Example validation for the password field."""
        data = self.cleaned_data["password"]
        if data.isnumeric():
            raise ValidationError("Alphanumeric value for password is required!")
        if data.isalpha():
            raise ValidationError("Alphanumeric value for password is required!")

        return data
The most interesting thing in this section is the object-oriented capability of Django models that we’re going to use for the account connected to wallets:
mainapp\models.html
class WalletAccount(Account):
    """Model class for accounts belonging to wallets."""

    wallet = models.ForeignKey(Wallet, default=None, on_delete=models.CASCADE)
Our model is inherited from the old Account model and we just add a foreign key to the wallet it belongs to. We also use the Django template system to avoid redundancy:
mainapp/templates/mainapp/wallet_account.html
{% extends 'mainapp/base_account.html' %}
{% block prefix %}Wallet{% endblock prefix %}
{% block start %}<p>Wallet: {{ wallet.name }} (ID: {{ wallet.wallet_id }})</p>{% endblock start %}
The page for displaying a wallet has a familiar structure:
mainapp/templates/mainapp/wallet.html
{% extends 'mainapp/base.html' %}
{% block title %}Wallet page{% endblock %}
{% block body %}
  <h1>Wallet page</h1>
  <p>Name: {{ wallet.name }}</p>
  <p>ID: {{ wallet.wallet_id }}</p>
  <p>Created: {{ wallet.created }}</p>

  {% if messages %}
    <ul class="messages">
      {% for message in messages %}
        <li{% if message.tags %} class="{{ message.tags }}"{% endif %}>{{ message }}</li>
      {% endfor %}
    </ul>
  {% endif %}

  <h2>Wallet accounts</h2>
  {% for account in wallet.walletaccount_set.all %}
    <li><a href="/wallet-account/{{ wallet.wallet_id }}/{{ account.address }}">{{ account.address }}</a> : {{ account.balance }} microAlgos</li>
  {% endfor %}
  <br>
  <a href="/create-wallet-account/{{ wallet.wallet_id }}/">Create wallet account</a>

{% endblock %}
The views and related code involved in the wallet creating and displaying processes follow the practice already presented in this blog post:
mainapp/views.py
from .forms import CreateWalletForm
from .helpers import add_wallet, get_wallet


def create_wallet(request):
    """Create wallet from the form data."""
    if request.method == "POST":

        form = CreateWalletForm(request.POST)

        if form.is_valid():

            wallet_id = add_wallet(
                form.cleaned_data["name"], form.cleaned_data["password"]
            )
            if wallet_id != "":
                Wallet.objects.create(
                    wallet_id=wallet_id,
                    name=form.cleaned_data["name"],
                    password=form.cleaned_data["password"],
                )
                message = "Wallet with name '{}' and ID '{}' has been created.".format(
                    form.cleaned_data["name"], wallet_id
                )
                messages.add_message(request, messages.SUCCESS, message)
                return redirect("wallet", wallet_id)

            form.add_error(None, "Wallet is not created!")

    else:
        form = CreateWalletForm()

    context = {"form": form}

    return render(request, "mainapp/create_wallet.html", context)


def create_wallet_account(request, wallet_id):
    """Create account in the wallet with provided ID."""
    model = Wallet.instance_from_id(wallet_id)
    wallet = get_wallet(model.name, model.password)
    address = wallet.generate_key()
    WalletAccount.objects.create(wallet=model, address=address)
    message = "Address '{}' has been created in the wallet.".format(address)
    messages.add_message(request, messages.SUCCESS, message)
    return redirect("wallet", wallet_id)


def wallet(request, wallet_id):
    """Display information of the wallet with provided ID."""
    context = {"wallet": Wallet.instance_from_id(wallet_id)}
    return render(request, "mainapp/wallet.html", context)


def wallet_account(request, wallet_id, address):
    """Display information of the wallet account with provided address."""
    context = {
        "wallet": Wallet.instance_from_id(wallet_id),
        "account": Account.instance_from_address(address),
    }
    return render(request, "mainapp/wallet_account.html", context)


def wallets(request):
    """Display all the created wallets."""
    wallets = Wallet.objects.order_by("name")
    context = {"wallets": wallets}
    return render(request, "mainapp/wallets.html", context)
We use the Key Management Daemon client for the purpose of creating and retrieving the wallets from the Algorand blockchain:
mainapp/helpers.py
from algosdk import kmd
from algosdk.wallet import Wallet


def _kmd_client():
    """Instantiate and return kmd client object."""
    kmd_address = "http://localhost:4002"
    kmd_token = "aaaaaaaaaaaaaaaaaaaaaaaaaaaaaaaaaaaaaaaaaaaaaaaaaaaaaaaaaaaaaaaa"
    return kmd.KMDClient(kmd_token, kmd_address)

def add_wallet(name, password):
    """Create wallet and return its ID."""
    try:
        wallet = Wallet(name, password, _kmd_client())
    except:
        return ""
    return wallet.id

def get_wallet(name, password):
    """Return wallet object from provided arguments."""
    return Wallet(name, password, _kmd_client())
A wallet object is returned if a user instantiates the Wallet class with a wallet name and a password. If such a wallet doesn’t exist then Algorand SDK simply creates it with that name and password.
Let’s do one more thing before we move to the next section. If we now visit project’s root/index page then both the standalone and wallet-based accounts will show up. Update the index view and use the Django object relational mapper to exclude the wallet-based accounts:
We use the base template as we’re going to code the wallet-based accounts functionality in this project that will use the same base template:
mainapp\templates\mainapp\base_account.html
{% extends 'mainapp/base.html' %}
{% block title %}Account page{% endblock %}
{% block body %}
  <h1>{% block prefix %}Standalone{% endblock prefix %} account page</h1>
  {% block start %}{% endblock start %}
  <p>Address: {{ account.address }}</p>
  <p>Created: {{ account.created }}</p>
  <p>Balance: {{ account.balance }} microAlgos</p>
  <br>
  {% if messages %}
    <ul class="messages">
      {% for message in messages %}
        <li{% if message.tags %} class="{{ message.tags }}"{% endif %}>{{ message }}</li>
      {% endfor %}
    </ul>
  {% endif %}
{% endblock body %}
As you can see from the presented code, if the initial funds transfer fails then the error message is rendered. Update our styling CSS too so the error text is displayed in red:
mainapp/static/mainapp/style.css
ul.messages li.error {
    color: red;
}

ul.messages li.success {
    color: green;
}
One more thing we should do before we get to the add_transaction SDK call - we need to update the account model with the proper balance method:
mainapp\models.py
from .helpers import account_balance

class Account(models.Model):
    #

    def balance(self):
        """Return this instance's balance in microAlgos."""
        return account_balance(self.address)
The code for that account_balance helper function should be straightforward: we use predefined (by Algorand Sandbox) tokens and API endpoints to instantiate Algod client and then we use the account_info method of that client to retrieve the amount in microAlgos.
mainapp\helpers.py
from algosdk.v2client import algod


def _algod_client():
    """Instantiate and return Algod client object."""
    algod_address = "http://localhost:4001"
    algod_token = "aaaaaaaaaaaaaaaaaaaaaaaaaaaaaaaaaaaaaaaaaaaaaaaaaaaaaaaaaaaaaaaa"
    return algod.AlgodClient(algod_token, algod_address)


def account_balance(address):
    """Return funds balance of the account having provided address."""
    account_info = _algod_client().account_info(address)
    return account_info.get("amount")
Assets creation
In this section, we’re going to create the Algorand assets in our application.
The URL configuration for the assets-related pages looks like this:
mainapp/urls.py
urlpatterns = [
    #
    path("assets/", views.assets, name="assets"),
    path("create-asset/", views.create_asset, name="create-asset"),
]
Update the base template and add another item to the navigation bar:
mainapp\templates\mainapp\base.html
    <div class="topnav">
      <a href="/"{% if request.path == '/' %} class="active"{% endif %}>Standalone accounts</a>
      <a href="/wallets/"{% if request.path == '/wallets/' %} class="active"{% endif %}>Wallets</a>
      <a href="/assets/"{% if request.path == '/assets/' %} class="active"{% endif %}>Assets</a>
    </div>
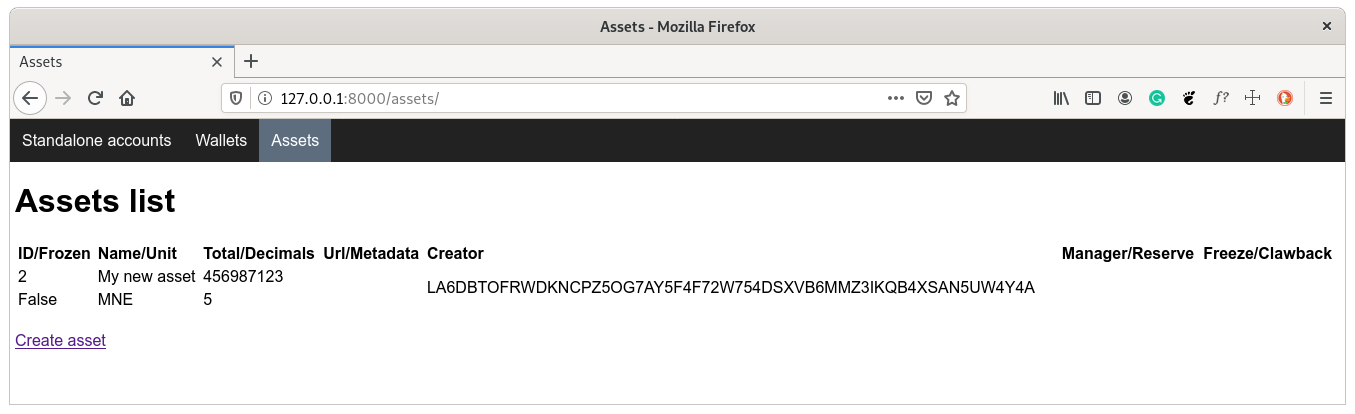
The assets list page follows the same structure as the other Algorand entity pages we have created before. The assets are shown in the form of table where each row represents a single asset from our database:
mainapp\templates\mainapp\assets.html
{% extends 'mainapp/base.html' %}
{% block title %}Assets{% endblock %}
{% block body %}
  <h1>Assets list</h1>
  {% if assets %}
  <table class="full-width">
  <tr>
    <th>ID/Frozen</th>
    <th>Name/Unit</th>
    <th>Total/Decimals</th>
    <th>Url/Metadata</th>
    <th>Creator</th>
    <th>Manager/Reserve</th>
    <th>Freeze/Clawback</th>
  </tr>
  {% for asset in assets %}
  <tr>
    <td>{{ asset.asset_id }}</td>
    <td>{{ asset.name }}</td>
    <td>{{ asset.total }}</td>
    <td>{{ asset.url }}</td>
    <td rowspan="2">{{ asset.creator }}</td>
    <td>{{ asset.manager }}</td>
    <td>{{ asset.freeze }}</td>
  </tr>
  <tr>
    <td>{{ asset.frozen }}</td>
    <td>{{ asset.unit }}</td>
    <td>{{ asset.decimals }}</td>
    <td>{{ asset.metadata }}</td>
    <td>{{ asset.reserve }}</td>
    <td>{{ asset.clawback }}</td>
  </tr>
  {% endfor %}
  </table>
  {% else %}
  <p>There are no assets.</p>
  {% endif %}
  <br>
  <a href="/create-asset/">Create asset</a>
{% endblock %}
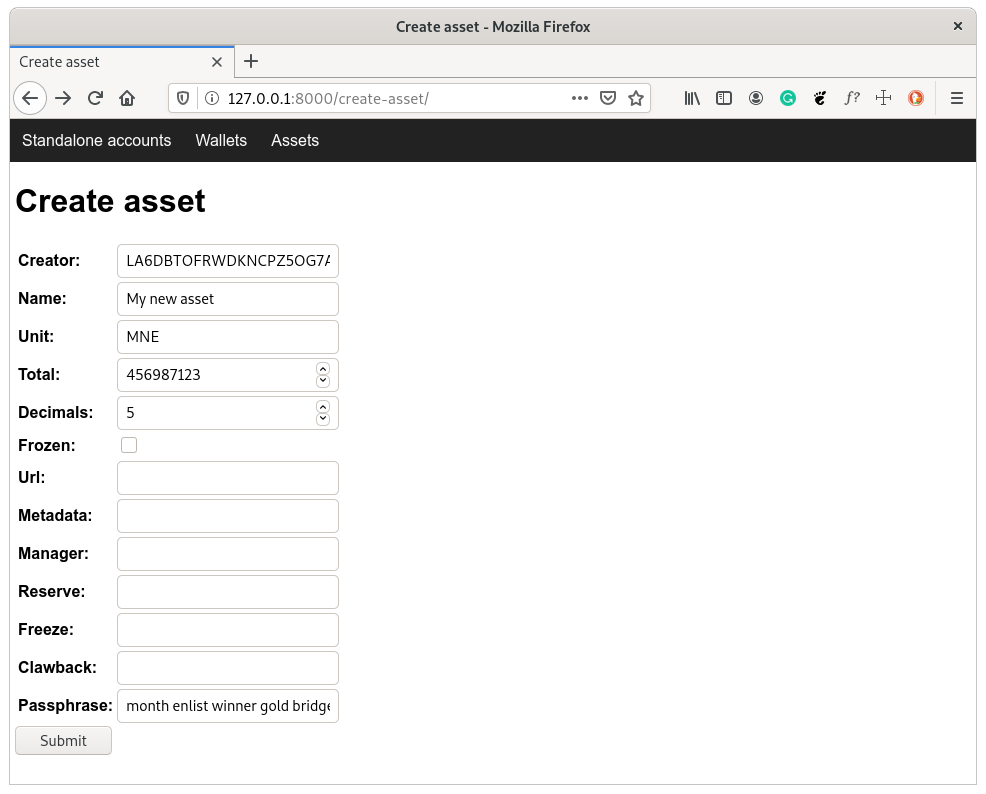
The template for the asset creation uses a familiar structure with a form rendered as a table:
mainapp\templates\mainapp\create_asset.html
{% extends 'mainapp/base.html' %}
{% block title %}Create asset{% endblock %}
{% block body %}
  <h1>Create asset</h1>
  <form action="/create-asset/" method="post">
    {% csrf_token %}
    <table>{{ form.as_table }}</table>
    <input type="submit" name="submit" value="Submit">
    <br><br><hr>
    <p><span style="color:red">WARNING: don't do this in production</span></p>
    <input type="submit" name="retrieve_passphrase" value="Retrieve passphrase">
  </form>
{% endblock %}
The asset model is responsible for saving the same asset properties we already presented in the assets list page template:
mainapp\models.py
from algosdk.constants import max_asset_decimals, metadata_length


class Asset(models.Model):
    """Model class for Algorand assets."""

    asset_id = models.IntegerField(blank=False)
    creator = models.CharField(max_length=address_len, blank=False)
    name = models.CharField(max_length=hash_len, blank=True)
    unit = models.CharField(max_length=8, blank=True)
    total = models.IntegerField(
        blank=False,
        validators=[MinValueValidator(1)],
    )
    decimals = models.IntegerField(
        blank=False,
        validators=[MinValueValidator(0), MaxValueValidator(max_asset_decimals)],
    )
    frozen = models.BooleanField(blank=False, default=False)
    url = models.URLField(blank=True)
    metadata = models.CharField(max_length=metadata_length, blank=True)
    manager = models.CharField(max_length=address_len, blank=True)
    reserve = models.CharField(max_length=address_len, blank=True)
    freeze = models.CharField(max_length=address_len, blank=True)
    clawback = models.CharField(max_length=address_len, blank=True)
    created = models.DateTimeField(auto_now_add=True)
The most interesting part in this section is the Django model form that we use to display, validate and save entered data to the database:
mainapp\forms.py
class CreateAssetForm(forms.models.ModelForm):
    """Django model form for creating Algorand assets."""

    passphrase = CharField(required=False)

    class Meta:
        model = Asset
        fields = (
            "creator",
            "name",
            "unit",
            "total",
            "decimals",
            "frozen",
            "url",
            "metadata",
            "manager",
            "reserve",
            "freeze",
            "clawback",
        )

    def _clean_address(self, field):
        """Base method for validation of fields holding Algorand address."""
        data = self.cleaned_data[field]
        if not is_valid_address(data):
            raise ValidationError("Provided value is not a valid Algorand address!")
        return data

    def clean_creator(self):
        return self._clean_address("creator")

    def clean_manager(self):
        return self._clean_address("manager")

    def clean_reserve(self):
        return self._clean_address("reserve")

    def clean_freeze(self):
        return self._clean_address("freeze")

    def clean_clawback(self):
        return self._clean_address("clawback")
The additional field passphrase has not been a part of the asset’s database record and it is used only to sign the transaction after the form is validated. For validation of the fields based on the Algorand address, we pass a field name to the base _clean_address method that uses Algorand SDK to validate the address.
The majority of the code in the views related to assets displaying and creating should be quite familiar to you by now:
mainapp\views.py
from .forms import CreateAssetForm
from .helpers import add_asset
from .models import Asset


def assets(request):
    """Display all the created assets."""
    assets = Asset.objects.order_by("-created")
    context = {"assets": assets}
    return render(request, "mainapp/assets.html", context)


def create_asset(request):
    """Create Algorand asset from the form data."""
    if request.method == "POST":

        if "retrieve_passphrase" in request.POST:
            creator = Account.instance_from_address(request.POST.get("creator"))
            request.POST = request.POST.copy()
            request.POST.update({"passphrase": creator.passphrase})
            form = CreateAssetForm(request.POST)
        else:

            form = CreateAssetForm(request.POST)

            if form.is_valid():

                asset_id, error_description = add_asset(form.cleaned_data)
                if error_description == "":

                    asset = form.save(commit=False)
                    asset.asset_id = asset_id
                    asset.save()

                    message = "Asset {} has been successfully created!".format(
                        form.cleaned_data["name"]
                    )
                    messages.add_message(request, messages.SUCCESS, message)
                    return redirect("assets")

                form.add_error(None, error_description)

    else:
        form = CreateAssetForm()

    context = {"form": form}

    return render(request, "mainapp/create_asset.html", context)
The only part that probably needs further explanation is the form-saving routine without committing. We use the form’s save method for both the model-level validation purpose and to get back the wallet model instance. We then update that instance with the wallet ID provided to us by Algorand SDK and then we finally save the record in the database.
The add_asset helper function instantiates the AssetConfigTxn class with the user data provided by the form. The rest of the code is similar to the code we used to transfer the Algos between accounts:
mainapp\helpers.py
from algosdk.error import WrongMnemonicLengthError
from algosdk.future.transaction import AssetConfigTxn


def add_asset(data):
    """Create asset from provided data dictionary."""
    client = _algod_client()
    params = client.suggested_params()
    unsigned_txn = AssetConfigTxn(
        sp=params,
        sender=data.get("creator"),
        asset_name=data.get("name"),
        unit_name=data.get("unit"),
        total=data.get("total"),
        decimals=data.get("decimals"),
        default_frozen=data.get("frozen"),
        url=data.get("url"),
        manager=data.get("manager"),
        reserve=data.get("reserve"),
        freeze=data.get("freeze"),
        clawback=data.get("clawback"),
        strict_empty_address_check=False,
    )
    # Sign with secret key of creator
    try:
        signed_txn = unsigned_txn.sign(mnemonic.to_private_key(data.get("passphrase")))
    except WrongMnemonicLengthError as err:
        return None, err

    try:
        transaction_id = client.send_transaction(signed_txn)
        _wait_for_confirmation(client, transaction_id, 4)
    except Exception as err:
        return None, err  # None implies non-field error

    try:
        info = client.pending_transaction_info(transaction_id)
        asset_id = info.get("asset-index")
        return asset_id, ""

    except Exception as err:
        return None, err
Search transactions
In the last section of this blog post, we’re going to create a basic form that uses the Algorand SDK indexer client to perform searching for the transactions on the blockchain.
For the start, update the navigation bar in the base template with the fourth item:
mainapp\templates\mainapp\base.html
    <div class="topnav">
      <a href="/"{% if request.path == '/' %} class="active"{% endif %}>Standalone accounts</a>
      <a href="/wallets/"{% if request.path == '/wallets/' %} class="active"{% endif %}>Wallets</a>
      <a href="/assets/"{% if request.path == '/assets/' %} class="active"{% endif %}>Assets</a>
      <a href="/search/"{% if request.path == '/search/' %} class="active"{% endif %}>Search transactions</a>
    </div>
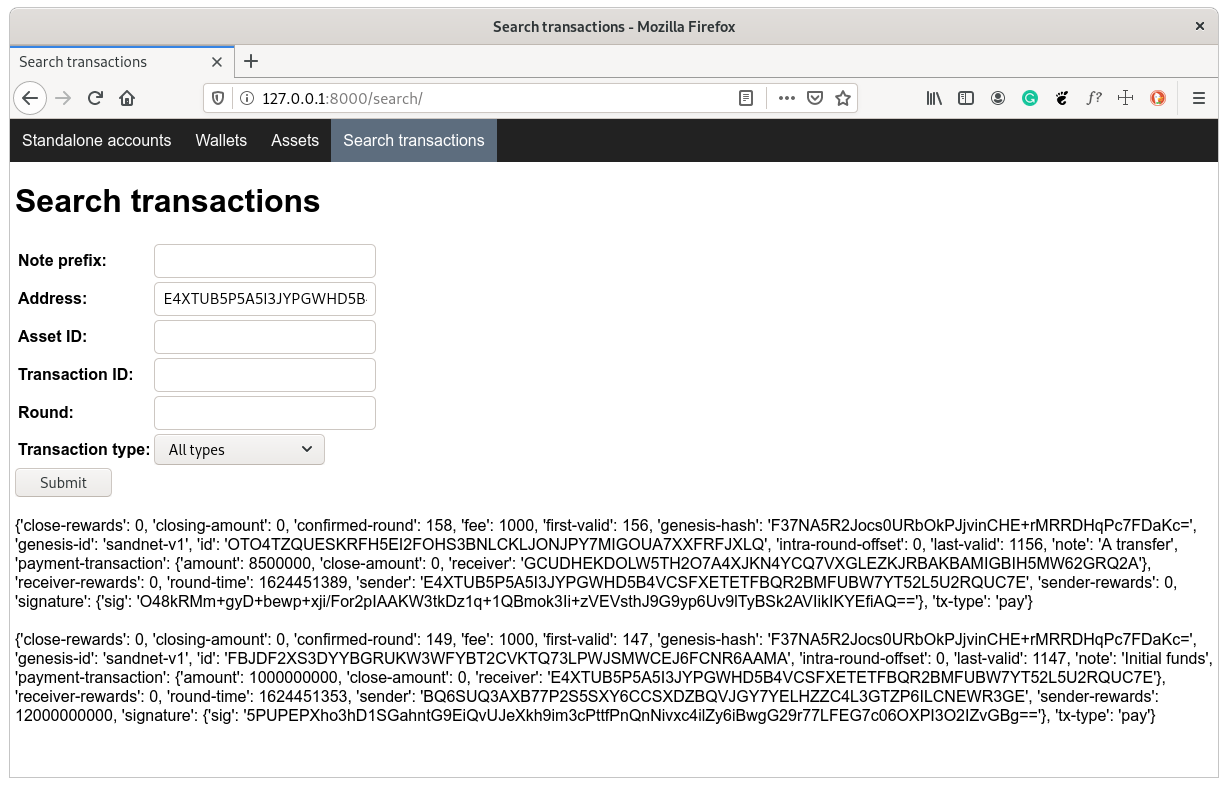
The template renders a form the way we’ve already used in this project, but this time the same template uses transactions context variable to display the found transactions:
mainapp\templates\mainapp\base.html
{% extends 'mainapp/base.html' %}
{% block title %}Search transactions{% endblock %}
{% block body %}
  <h1>Search transactions</h1>
  <form action="/search/" method="post">
    {% csrf_token %}
    <table>{{ form.as_table }}</table>
    <input type="submit" value="Submit">
  </form>
  <br>
  {% for transaction in transactions %}
    {{ transaction }}
    <br><br>
  {% endfor %}
{% endblock %}
You should add one more entry in the main application’s URL configuration module:
mainapp/urls.py
urlpatterns = [
    #
    path("search/", views.search, name="search"),
]
The form used to accept users data brings some new elements we haven’t yet used in this blog post:
mainapp/forms.py
class SearchTransactionsForm(forms.Form):
    """Django form for searching Algorand transactions."""

    note_prefix = forms.CharField(required=False)
    address = forms.CharField(required=False)
    asset_id = forms.CharField(required=False, label="Asset ID")
    txid = forms.CharField(required=False, label="Transaction ID")
    block = forms.CharField(required=False, label="Round")
    txn_type = forms.ChoiceField(
        required=False,
        choices=[
            ("", "All types"),
            ("pay", "Payment"),
            ("keyreg", "Key registration"),
            ("acfg", "Asset configuration"),
            ("axfer", "Asset freeze"),
            ("afrz", "Asset transfer"),
        ],
        label="Transaction type",
    )

    def clean_note_prefix(self):
        """Algorand SDK needs bytes-like object for note prefix."""
        data = self.cleaned_data["note_prefix"]
        return data.encode("ascii") if data != "" else data

    def clean(self):
        """Ensure at least one field is non-empty."""
        cleaned_data = super().clean()
        if all(val == "" for val in cleaned_data.values()):
            raise ValidationError("You must fill at least one field!")

        return cleaned_data
As you’re going to see in the helper function connected to the search capability, we need the exact field names like in Algorand SDK for the search functionality of the application. As those field names aren’t always human-comprehensible, we added the label named argument for those fields that replace the generic label created from the field name.
Another new element is the use of choices for the txn_type field - we limit the input to a list of pre-defined types to reduce the possibility of error.
And finally, we introduce the non-field/form level of validation with the clean method. The validation error raises for a condition created not from just one field, but rather from multiple fields (or from all of them in this case).
mainapp/views.py
from .forms import SearchTransactionsForm
from .helpers import search_transactions


def search(request):
    """Search transactions based on criteria created from the form data."""
    transactions = []
    if request.method == "POST":

        form = SearchTransactionsForm(request.POST)

        if form.is_valid():

            transactions = search_transactions(form.cleaned_data)

    else:
        form = SearchTransactionsForm()

    context = {"form": form, "transactions": transactions}

    return render(request, "mainapp/search.html", context)
The view that renders our looks familiar. As you can see, we pass the empty list as the template context in the case of a GET request or an invalid POST request. The same happens when Algorand SDK can’t find any result based on our search criteria.
mainapp/helpers.py
def search_transactions(data):
    """Search transaction based on criteria from provided data."""
    criteria = {key: val for key, val in data.items() if val != ""}
    transactions = (
        _indexer_client().search_transactions(**criteria).get("transactions", [])
    )
    # Decode notes to human-readable strings before returning the list
    for tr in transactions:
        tr["note"] = base64.b64decode(tr.get("note", "")).decode("utf-8")
    return transactions
The Algorand’s Indexer search_transactions method accepts various named arguments used to search on the blockchain. We use that fact to create non-empty pairs from our form field names and corresponding values.
Conclusion
We introduced the reader to some basic concepts of Python Algorand SDK and the Django framework. Use the presented material and publicly available code to start working on your own projects based on the Algorand blockchain.
For any question or suggestion you may have, use the issues section of the algodjango project or use the Algorand Discord channel.
Enjoy your coding!